Setting up Retrolambda
Java 8 introduces the much awaited lambda expression and method reference. Unfortunately, at the time of writing, Android does not support Java 8. Thankfully, there is a project called Retrolambda that allows you to backport lambda expressions and method references to Java 7. As Android uses the Gradle build system, this guide will be using the Retrolambda gradle plugin to add Retrolambda to an Android project.
Prerequisites
Retrolambda requires that Java 7 and Java 8 are installed on your machine.
Step 1: Add the buildscript dependencies
Add classpath 'me.tatarka:gradle-retrolambda:3.2.2' and mavenCentral() to the project level build.gradle file as shown below:
buildscript {
    repositories {
        ...
        mavenCentral()
        ...
    }

    dependencies {
        ...
        classpath 'me.tatarka:gradle-retrolambda:3.2.2'
        ...
    }
}
Step 2: Apply the plugin
Apply the retrolambda plugin by adding the following to the top of your app build.gradle file:
apply plugin: 'me.tatarka.retrolambda'
Step 3: Set compile options
Add the following to your app build.gradle file:
android {
    ...
    compileOptions {
        sourceCompatibility JavaVersion.VERSION_1_8
        targetCompatibility JavaVersion.VERSION_1_8
    }
    ...
  }
Step 4: Configure the plugin
Add the following to your app build.gradle file:
retrolambda {
    oldJdk JAVA7_HOME
    jdk JAVA8_HOME
}
Step 5: Create a gradle properties file
Create a file named gradle.properties in the root level of your project directory.
Step 6: Specify JAVA8HOME and JAVA7HOME
Add the JAVA8HOME and JAVA7HOME values to the gradle.properties file, making them point to the location of the Java 7 and Java 8 jdks on your machine:
JAVA7_HOME=/Library/Java/JavaVirtualMachines/jdk1.7.0_71.jdk/Contents/Home
JAVA8_HOME=/Library/Java/JavaVirtualMachines/jdk1.8.0_40.jdk/Contents/Home
Note: the retrolambda project README suggests you set these fields as environment variable. However, on OSX Yosemite, Android Studio seems to be unable to find these variables (see this issue. Setting them in a gradle.properties file gets around this.
Step 7: Update .gitignore
Add gradle.properties to your projects .gitignore file. This allows local gradle.properties files to point to different locations, depending on where java 7 and java 8 are located on the machine.
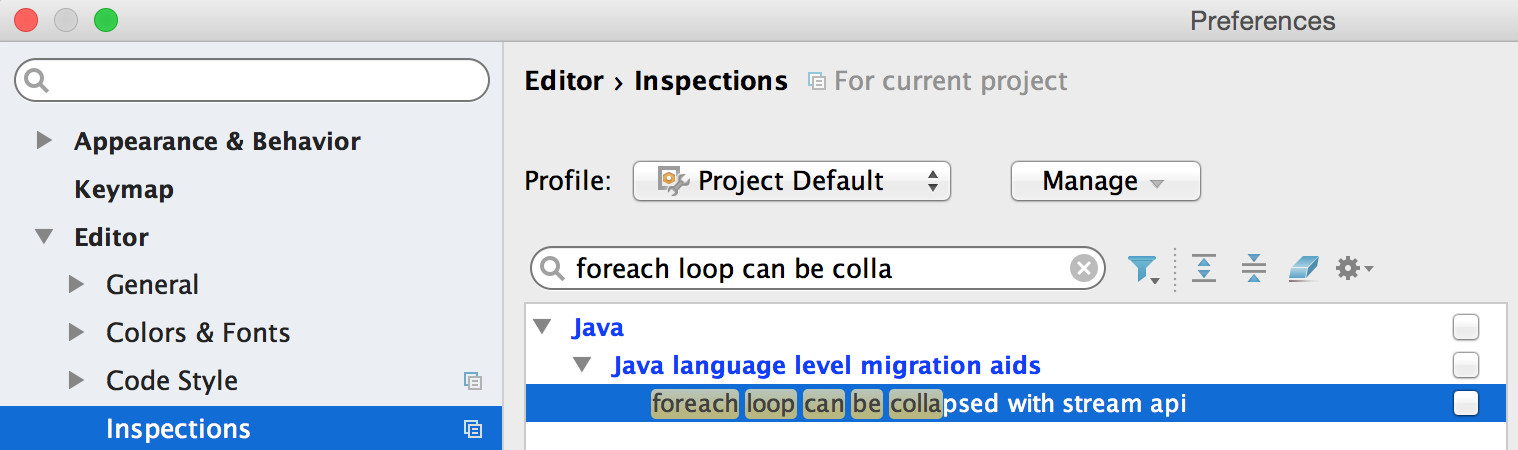
Step 8: Update Android Studio Inspections
Although the source compatibility of the project has been set to Java 8, you won't have access to the Java 8 libraries. So it's important to uncheck the Android Studio inspection that suggests "foreach loop can be replaced with stream api" as using the Java 8 stream API will cause a runtime exception:
At this point you will be able to use lambda expression in your java source files. The additional steps bellow are helpful if you use ProGuard or a CI server like Jenkins.
Step 9 (Bonus): Update proguard-rules.txt
If you are using ProGuard make sure to update the apps proguard-rules.txt file with the following to prevent it from failing:
#Retrolambda
-dontwarn java.lang.invoke.*
Step 10 (Bonus): Set properties using switches on the build server
If you are using a CI server, like Jenkins, you can set the gradle properties of JAVA7HOME and JAVA8HOME using a switch. For example:
gradle -P JAVA7_HOME=/Volumes/Jenkins/tools/hudson.model.JDK/Java_7 assembleRelease
Check out this project for an example of how to set up Retrolambda.